Name our number one favorite camping activity:
No, not visiting breweries, but we do like that a lot...
No, not wineries either. Geez, you guys! (but those are awesome too)
Campfires! YES! Great guess!
Because we love campfires so much, we want to be sure we can get one started, wherever we go. Our first season of camping, we used Coghlan's Waterproof Fire Sticks.
There's nothing wrong with these. They get the job done, and aren't very expensive. However, we were down to our last stick and we were going camping for the weekend, and weren't going to be anywhere to get more. I decided it was time to make my own, and I had been gathering the supplies needed for quite some time, so I was ready to make it happen. Here's what you need:
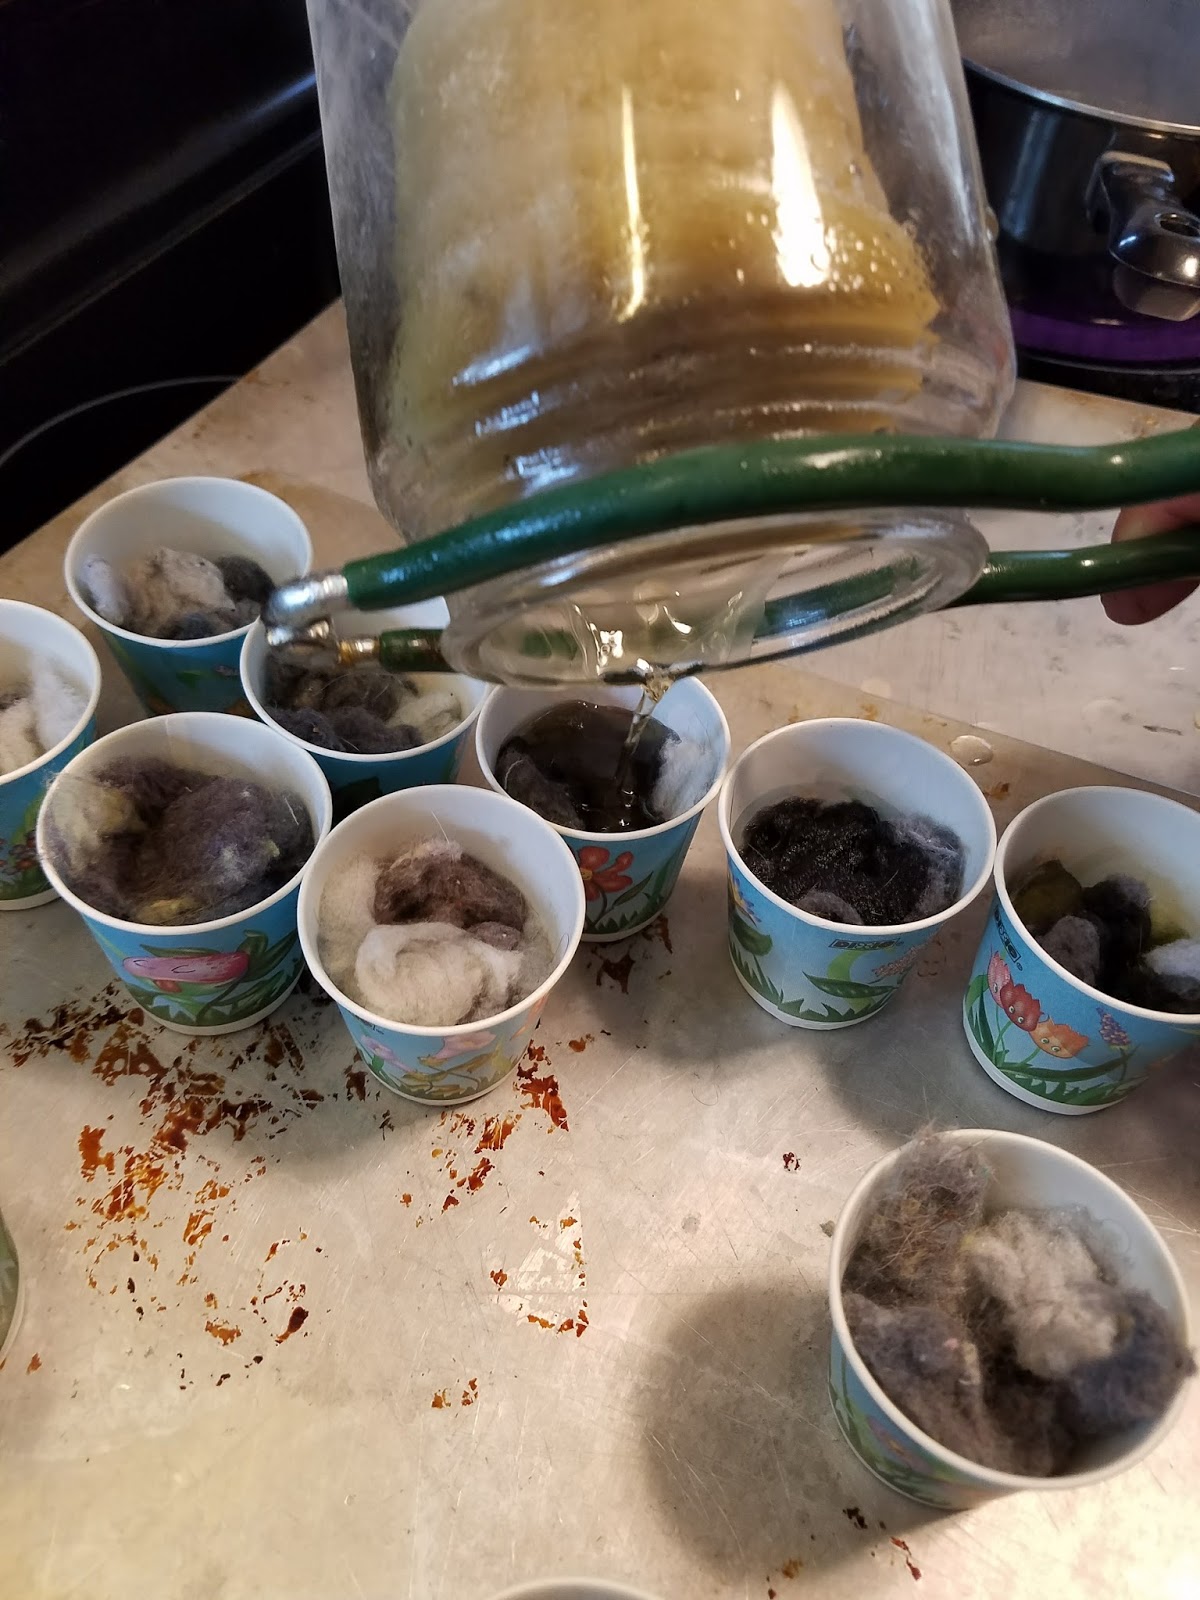
- small paper cups, like Dixie Cups:
- dryer lint
- old candles to melt down for the wax
- saucepan
- something to set the cups on to keep wax from getting everywhere. I used an old cookie sheet
Step one was to line up a bunch of cups on the cookie sheet, then stuff each one with a blob of dryer lint. (Nice measurement, huh? No need to be exact.)

Step two was to put the candles in a saucepan on the stove to melt down the wax. I chose to use an old saucepan that was never going to touch food again. Thrift stores are a great place to get one if you don't have one! I did this two ways, one was an old jar candle in water. We kept the heat kind of low because I was slightly afraid the glass would crack if it got too hot. It took a while to melt, but the glass didn't break.

The second way was to break up multiple candles and just melt them down:

*An option to this step is to add a few drops of an essential oil. I chose Kis oils lemongrass, as it supposedly has mosquito repelling properties, but it also just smells nice. 😉 I didn't really notice the aroma as the fire burned, but I do notice it when I take a fire starter out of the plastic bin!

Step three involved pouring some wax into each cup, enough to cover the lint. The lint shrinks down as it gets smothered, and that's fine. I found this to be an extremely messy process. I probably would have done better with a spout of some kind on the pan, but eh... it worked.
Step four, let them cool and harden.
Step five, push down the tops of the cups so it kind of covers the mess inside. They aren't pretty, but they do work!

That's it! The next thing we did was pack them into a plastic tub, put it in the camper, then use one to start a fire.

Our test showed it lit quickly with a long lighter, and it burned for over 13 minutes. I'd say that should do the trick!

There it is, right in the center.

This was a second one we used as a "control." We lit it on the concrete pad next to the fire pit and timed how long it burned.

By thirteen and a half minutes, it was just about done, pretty charred, so I stopped the timer.
Whether you buy fire starters or make them yourself, I definitely recommend having them in your camping kit!
Happy camping!
This is pretty cool. Not being a camper I wouldn't have thought of any of this. Your blog is so informative!!
ReplyDeleteWow, I taught someone something? Cool! Thanks for reading and commenting. :)
Delete